Good practice and simple tricks for X-Ray powder diffraction measurements: procedures for preparation and mounting of the specimen and for alignment and calibration of the diffractometer.
N.M. van der Pers and R. Delhez
Department of Materials Science and Engineering, Delft University of Technology
Rotterdamseweg 137, 2628 AL Delft, The Netherlands.
In the past twenty years the increases in sophistication and precision of instrumentation have greatly improved the data recorded by X-Ray diffraction. Also, the data evaluation appears to have reached almost the level of an “expert system”. In comparison with these improvements the central role of how the user handles the specimens and the instrument seems to be neglected.
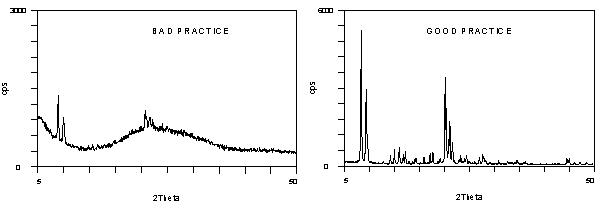
Careful preparation and mounting of the specimen is still a crucial first step to optimize the quality of the measurements. A step-by-step procedure will be presented that takes into account the conditions of the specimen surface, its exact position, dimensions and crystal statistics and thereby leads to a correct choice of the preparation method. Examples from practice will be given.
A sedimention method exists that produces a very thin and uniform layer of powder material, which results in sharp diffraction profiles and thus facilitates phase identification, size-strain determination and Rietveld analysis. Methods that prevent the development of preferred orientation during the preparation of powder specimens greatly improve their quantitative analysis. The protection of air sensitive materials by plastic films and capillaries will be discussed.
A versatile specimen holder with a “zero-background” substrate and built-in vertical adjustment will be demonstrated. The reduction of the background due to air scatter from the primary beam by a simple device when using a Position Sensitive Detector (PSD) is illustrated by the phase identification in tiny fragments from oil paintings.
For stress and texture determination attention will be paid to the correct orientation of the specimen with respect to the coordinate system as defined in the measuring and evaluation programs used.
The alignment of the diffractometer contains critical steps, in particular concerning beam collimation and monochromatization. Calibration measurements at regular time intervals using suitable reference materials is of great importance to keep track of diffractometer performance. A well aligned “standard” diffractometer in Bragg-Brentano geometry can even be used for reflectometry (grazing incidence) measurements of thin films.
By applying the mentioned good practice and simple tricks, the accuracy of the instrument can be used to its limits and this improves the trueness and precision of the final results.
